How to: Harvest, Dry, Trim, Cure, & Store Homegrown Cannabis!
So, you’ve been legally growing your own cannabis but you’re not quite sure how to harvest it… We’ve all been there and it’s a proud achievement to have made it this far. But don’t worry, we’ll take you on a detailed journey on how to harvest your cannabis – and the process that comes after!
If you don’t have the time or patience to grow your own, feel free to browse our dispensaries for some quality cannabis options.
Harvesting practices do differ between growers and as you get more experienced, you may find yourself adopting your own technique. However, there are some best practices that will apply across the board.
So, let’s start with the first step – harvesting!
When is a cannabis plant ready to harvest?
There’s a few tell-tale signs to look out for when trying to determine whether your cannabis plant is ready to harvest. It’s important to know which strain you’re growing, as these signs will differ between plants.
But, there’s also a few things you can be sure of…
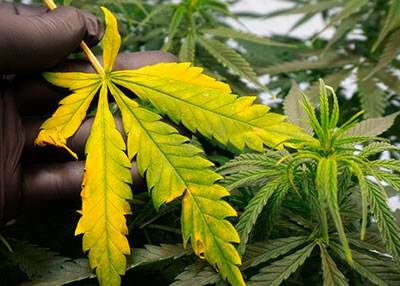
The yellowing of the leaves
When your plant is ready for harvest, you may notice some of the leaves beginning to yellow. In some cases, they will curl and even fall off. This is a completely normal indicator that your cannabis is ready for harvest.
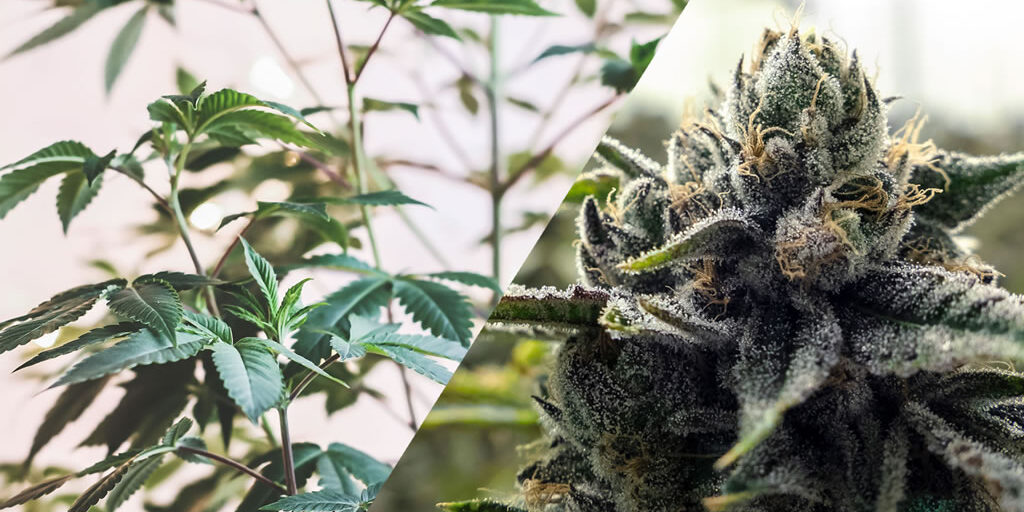
Plump and developed buds
This is probably one of the most obvious signs – but pay close attention! When the buds no longer appear to be growing larger, they’re fully developed and ready for harvesting.
Hanging branches
Naturally, as your buds grow – and especially as they reach their peak growth – the branches will begin to hang. Combine this with the other signs, and you’ve got yourself a harvestable plant!
Don’t focus too much on time
 As mentioned, each strain has its own tell tale signs, and some of these strains take longer to develop than others. We covered the stages of a cannabis plant in our Cannabis 101 guide.
However, while we know that different strains and plants take longer than others, these times are just estimates. You should not rely on them in the harvesting process. This is because each plant is unique and its location and growing conditions can also factor into how long it takes to fully develop.
We recommend that you pay some attention to time – but don’t be alarmed if your plant is taking a little longer than recommended. It’s all part of the process.
Time to harvest – step by step
Now that you’re sure your plant is ready for harvest, there’s a couple of steps you’ll need to go through to ensure a successful process.
Step 1 – Schedule the time
The perfect time of day to start the harvest is in the early morning. Or, if you’re cultivating the plant indoors, then this will be when the lights turn on.
This ensures that the plant has had the entire night beforehand to optimize its resin production and you’re getting the richest product.
Step 2 – The harvest
When harvesting the plant, you’ll want to cut them one at a time. Doing them all at once will result in a long wait time before trimming.
Oftentimes, you’ll find that the buds at the top of the plant become ripe a lot quicker. You may choose to only remove the top portion for harvest if this is the case. This will give your bottom buds some time to soak in the sun (or light). This will help make trimming a little more manageable, too.
If harvesting the whole plant, you’ll want to ensure you cut them at the base – ideally at or below soil level.
How and when to trim cannabis
 First, you need to know that there are two methods when trimming your cannabis. You can do it wet or dry. The best method is a highly debated topic by cannabis growers, and you’ll have plenty of time to figure out what works for you.
Both methods have its advantages and disadvantages…
Wet trimming
If using this method, you’ll need to wear gloves to prevent the resin from sticking to your hands. You’ll also need to be very careful – you don’t want to crush the buds during the trimming process.
Start by cutting the larger leaves and then the smaller, working toward the base of the petiole (the stem). If you take too long with this process, it can result in mold during the drying process.
Wet trimming is all about the airflow. Because of this, the leaves will begin to dry during the process and you may see some curling. This can make it difficult to get to some of the leaves, so be as precise as you can. But there’s also no need to be a perfectionist, unless you’re trying to get your buds on the cover of vogue. Be as thorough as you want, but remember a stray leaf or two isn’t the end of the world – especially as there are trichomes and THC on some of the leaves.
Dry trimming
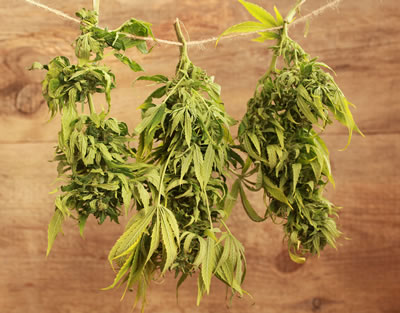
Similar to wet trimming, you’ll need to start by removing the larger leaves. After this, you can hang the plants upside down and let them dry out. This will usually take around a week. You’ll need to be careful when leaving the small leaves on, however, as mold and mildew can develop.
After the moisture is gone from the buds and the smaller leaves are dry, carefully trim them. Make sure you avoid the buds during this process, as being too rough with the plant can cause the bud to fall off.
You should consider dry trimming if the humidity level in the drying room is low or you can easily adjust it. Because controlling the humidity can get expensive, most people opt for wet trimming. However, dry trimming can result in a much better smell and taste due to the slower process and oxidation throughout the drying process.
Drying your cannabis plants
 Whichever method you choose, you’ll need to know how to correctly dry your plants to avoid the dreaded mold!
Once you’ve removed the larger leaves or finished the wet trimming process, tie your plants at the base of the main stem and hang them upside down. An easy way to do this is by hanging them on a wall-to-wall line – similar to a clothes line. This process will remove around 75% of the water content from the plants.
It will take approximately 15 days for your buds to be dry and ready for the curing stage.
Here’s how to ensure your drying process goes without a hitch:
- Keep them in a dark room with a temperature between 18 and 23ºC and a humidity level between 55 and 65%.
- Daily monitoring of the plants will ensure that any mold or mildew is detected quickly. If you find an infected flower, remove it and dispose of it.
- Taste the cannabis after 15 days and check its ripeness. The plant should be completely dry by the end of one month, after which is can be consumed.
How to cure your cannabis plants
If you wish to improve the quality of your cannabis, then you’ll need to partake in the curing process. During this process, it’s important that you monitor the temperature, humidity and light – these will greatly affect the quality of your plant and the final product.
The curing process can be as long or short as you like – to a maximum of eight months – but here’s a look at an ideal process:
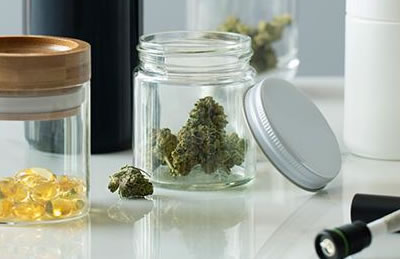
- Place your buds in an airtight glass jar. Open the jar in a dark room for ten minutes every day for a total of three weeks.
- Ensure the temperature and humidity in the room is consistent at around 20ºC and 50% respectively. If the humidity inside the jars exceeds 70%, you’ll need to remove them for a day or two.
- Taste the flowers on a weekly basis to check their ripeness. If you notice the taste become bland or leafy, add some citrus peels to the jar for a maximum of eight days.
- Open the jars for 20 minutes twice a month for the following four months. If you begin smelling an ammonia aroma, this means the cannabis is too wet and will begin to spoil.
- On month five, open them only once for 10 minutes.
If you witness mold at any point during the curing process, then this is a sign that your cannabis was far too wet and is not suitable for consumption. For help ensuring that you don’t run into any issues during the process, use a hygrometer inside your container.
Storing your cannabis
 Once you have finished the curing process, you should move to long term storage. Choose any air-tight container you like and store it in a temperate, dark location. It’s best practice to open the jar once a month for ventilation, but it’s not strictly necessary. So, if you forget – it’s not the end of the world.
We also wrote a dedicated post on how to store cannabis, so check it out!
Some people opt to vacuum or freeze their cannabis. This can be a good option, but can result in your weed losing some of its best properties. Just make sure you don’t crush the buds if you use this method!

